Uploads
The Uploads tab shows all files you have personally uploaded to the NUVIEW Platform. This is distinct from subscription datasets, which are managed by NUVIEW.
Uploading a file
- Click + Add data in the top-right corner of the Data Management screen.
- Select the file(s) you want to upload from your computer.
- Give the dataset a name and add any relevant tags.
- Click Upload to add the file to your account.
Once uploaded, the file will appear in both the Uploads tab and the Data storage tab.
Supported file formats
The NUVIEW Platform supports the following upload formats:
- Vector: GeoJSON, KML, KMZ, Shapefile (zipped)
- Raster: GeoTIFF, JP2
- Point cloud: LAZ, LAS
Please contact support@nuview.space to upload raster and point cloud data.
Coordinate system requirements
All uploaded files must use a geographic coordinate system (WGS 84 / EPSG:4326) or a recognized projected CRS. The platform reprojects data on ingest where possible, but files in unsupported or undefined projections may not display correctly.
Recommendations:
- Reproject to WGS 84 (EPSG:4326) before uploading if you are unsure of your file's CRS
- For Shapefiles, include the
.prjfile in the ZIP — without it the platform cannot determine the projection - For GeoTIFF, ensure the file has an embedded CRS (check with QGIS or
gdalinfo)
If your data appears in the wrong location after upload, a CRS mismatch is the most likely cause. Contact support@nuview.space for help reprojecting your data.
Managing uploads
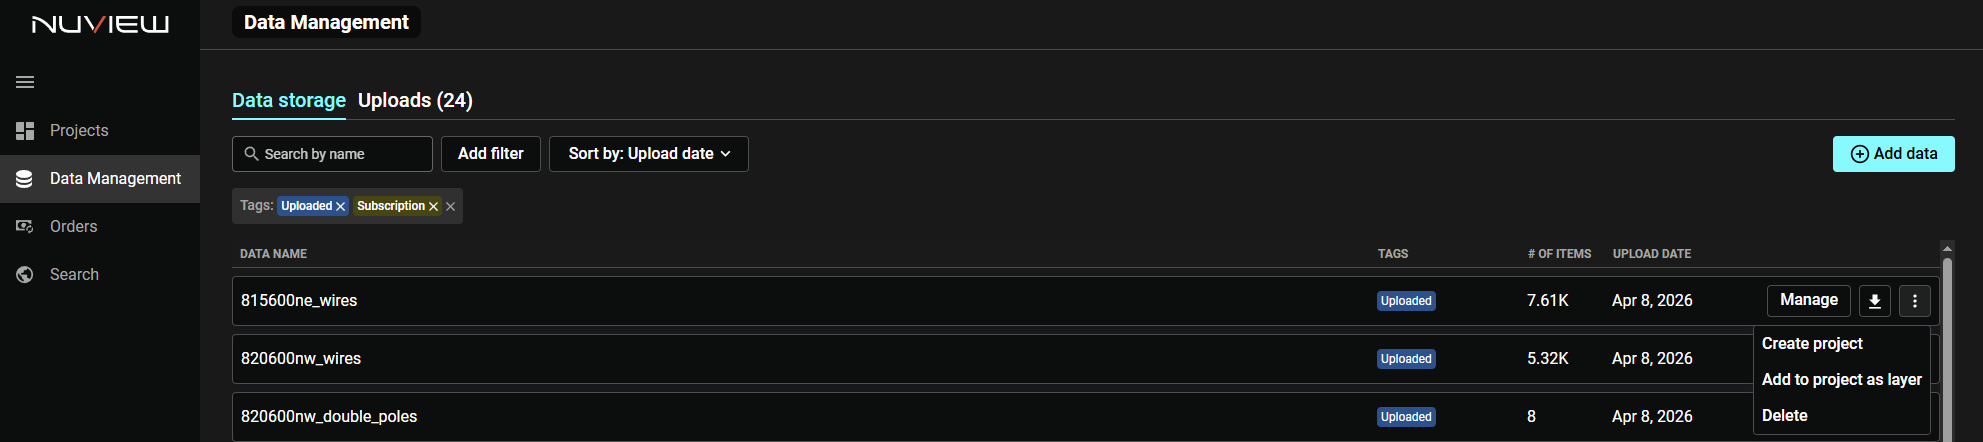
Each uploaded file has action controls on the right side of its row:
- Manage — Open dataset details
- Download (↓) — Download the file to your computer
- ⋮ Menu — Access additional options:
- Create project — Start a new project using this file as its source
- Add to project as layer — Add this file as a layer to an existing project
- Delete — Permanently remove the file from your account
Note: Deleting an upload removes it from any projects or layers it is currently assigned to.