Configure a project
Once you have a project, you can configure its details so teammates can understand its purpose and so the project is set up for your workflow. This article covers all project configuration options:
- Project Configuration Overview
- Edit Project Details
- Edit Project Sites
- Edit Project Layers
- Edit Project Settings
Project Configuration Overview
To open the project configuration screen, click into the project and select the Edit Project Configuration gear icon in the top-right corner of the project view.
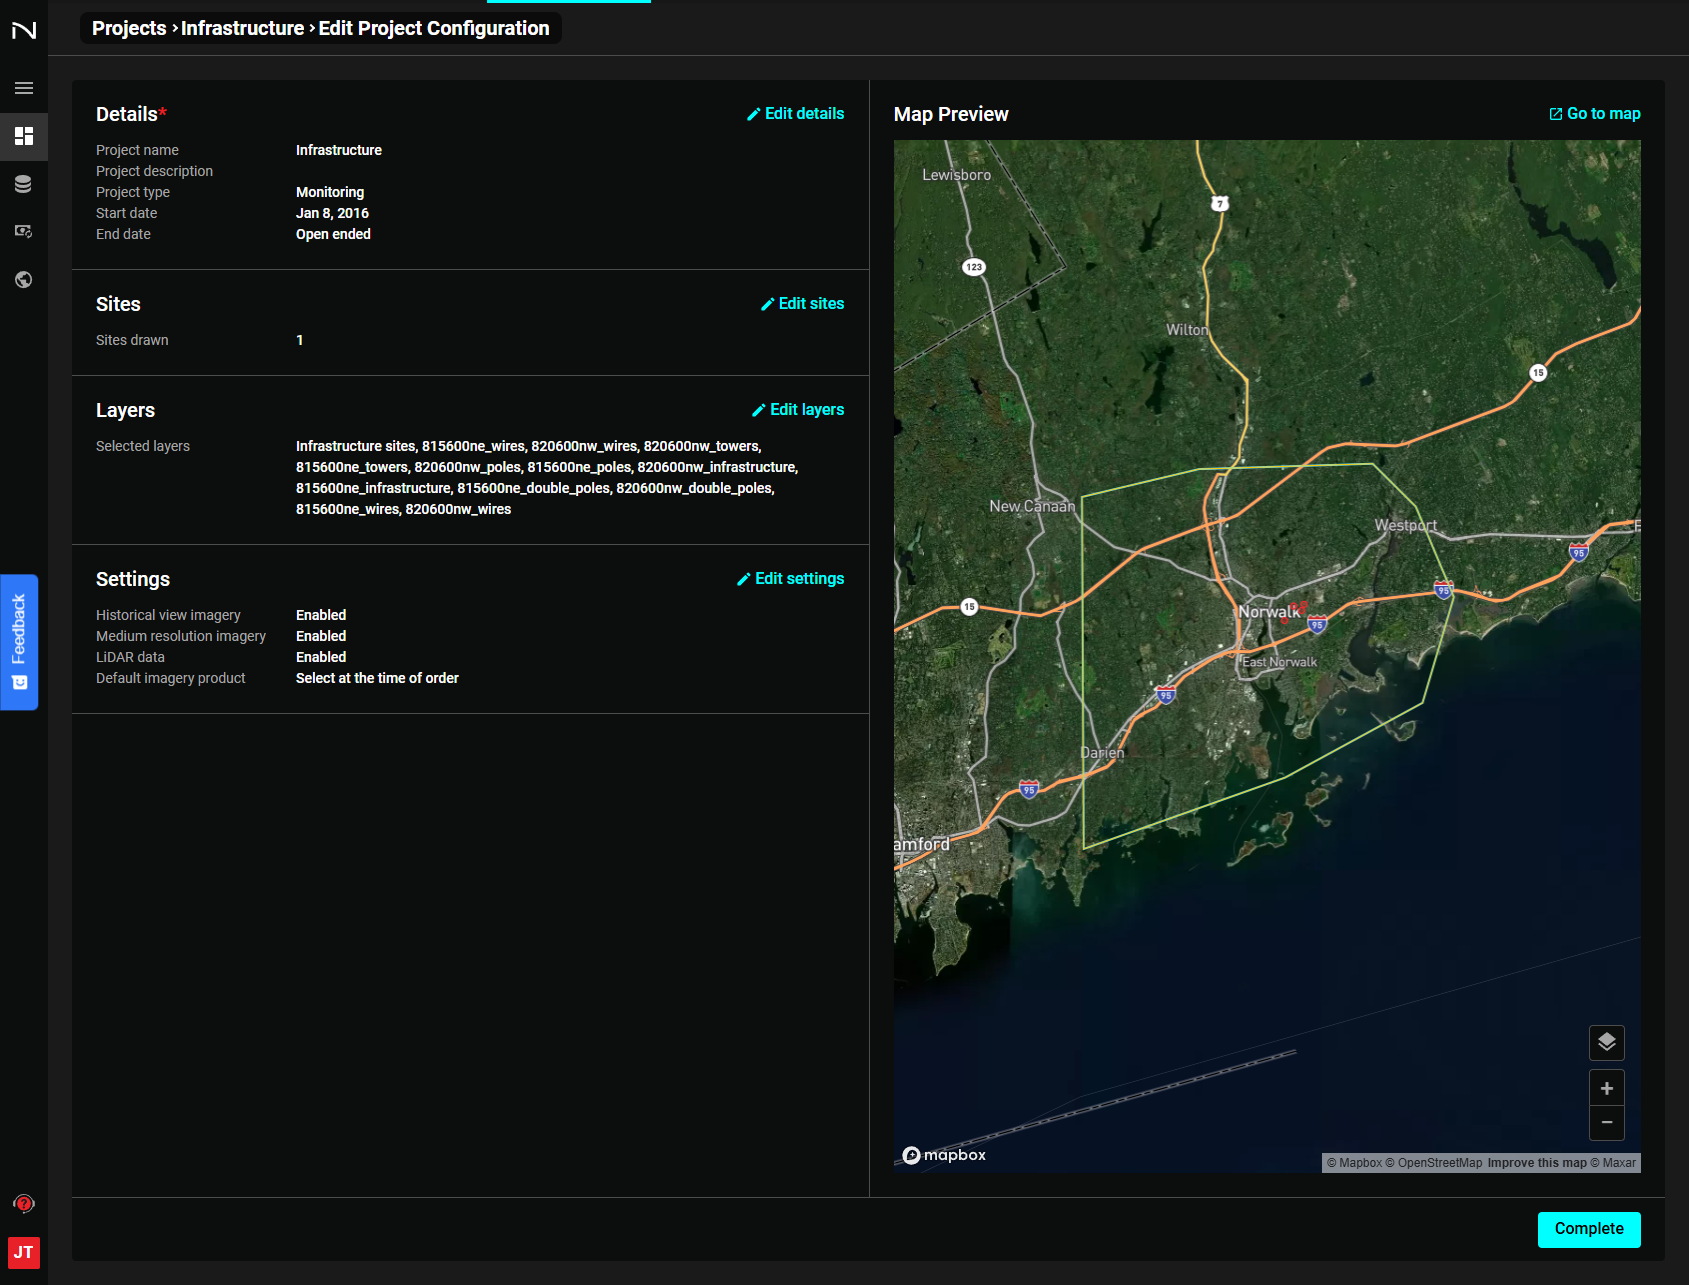
The left side of the screen shows the project's current Details, Sites, Layers, and Settings sections — each with an Edit button. The right side shows a map preview of the project area.
The map preview lets you verify you're editing the correct project. Click Go to map to return to the full interactive map view.
For each of the following actions, be sure to select "Save" before selecting "Complete" to save any changes made to your project configuration.
Edit Project Details
Click Edit Details to open the details form.
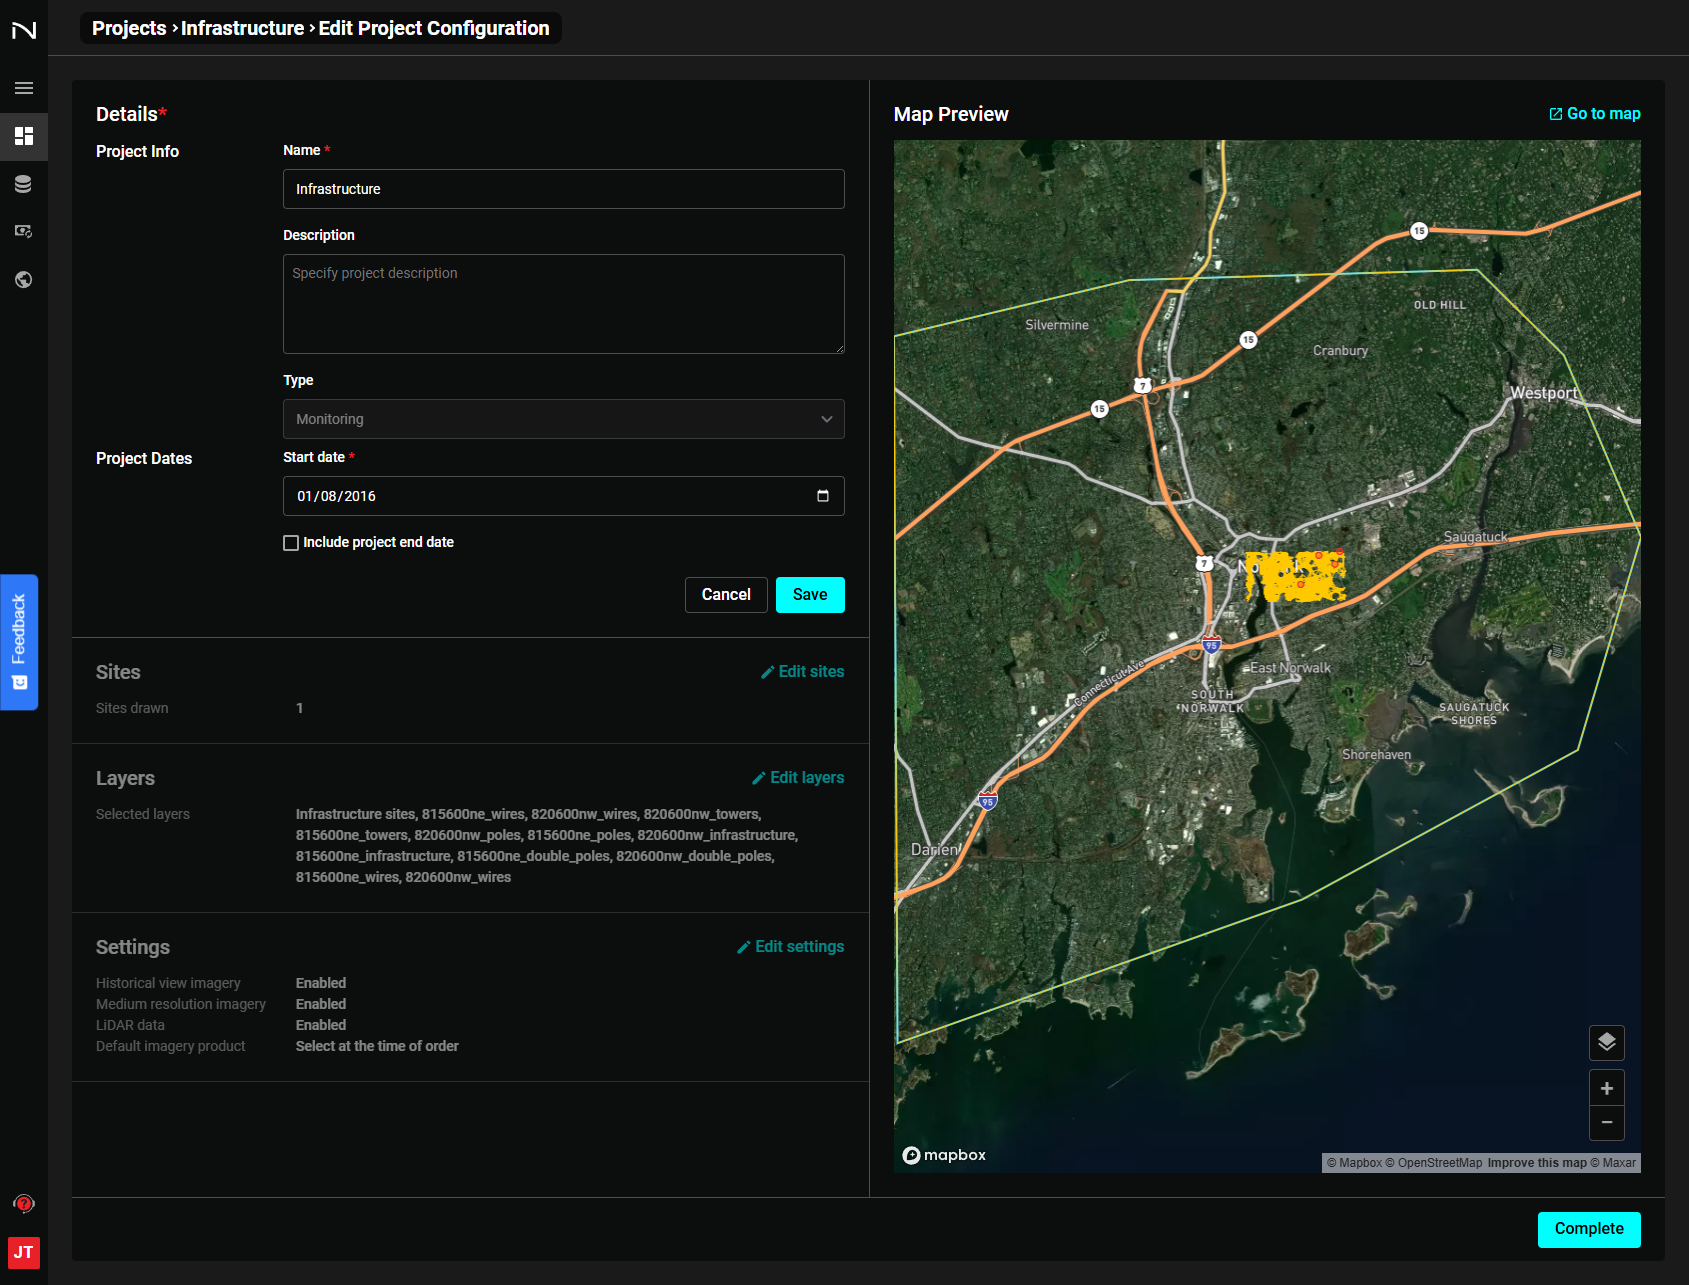
Project Name
Give the project a clear, descriptive name. This helps when managing many projects across your team.
Project Description
Describe the project's purpose and scope. A clear description helps teammates who are less familiar with the project get up to speed quickly.
Project Start Date
By default, a new project's start date is set to one year before it was created.
You will only be able to view imagery back to the project start date. If the imagery you would like to visualize is dated prior to the project start date, adjust the project start date back in time.
Project End Date
Check Include project end date to set an optional end date. Adding an end date limits the timeline to that date — any imagery captured after that date will not appear in the project.
Recommendation: Keep an open-ended project end date unless you specifically need to limit the timeline to a fixed period.
Edit Project Sites
Click Edit Sites to expand the Sites panel.
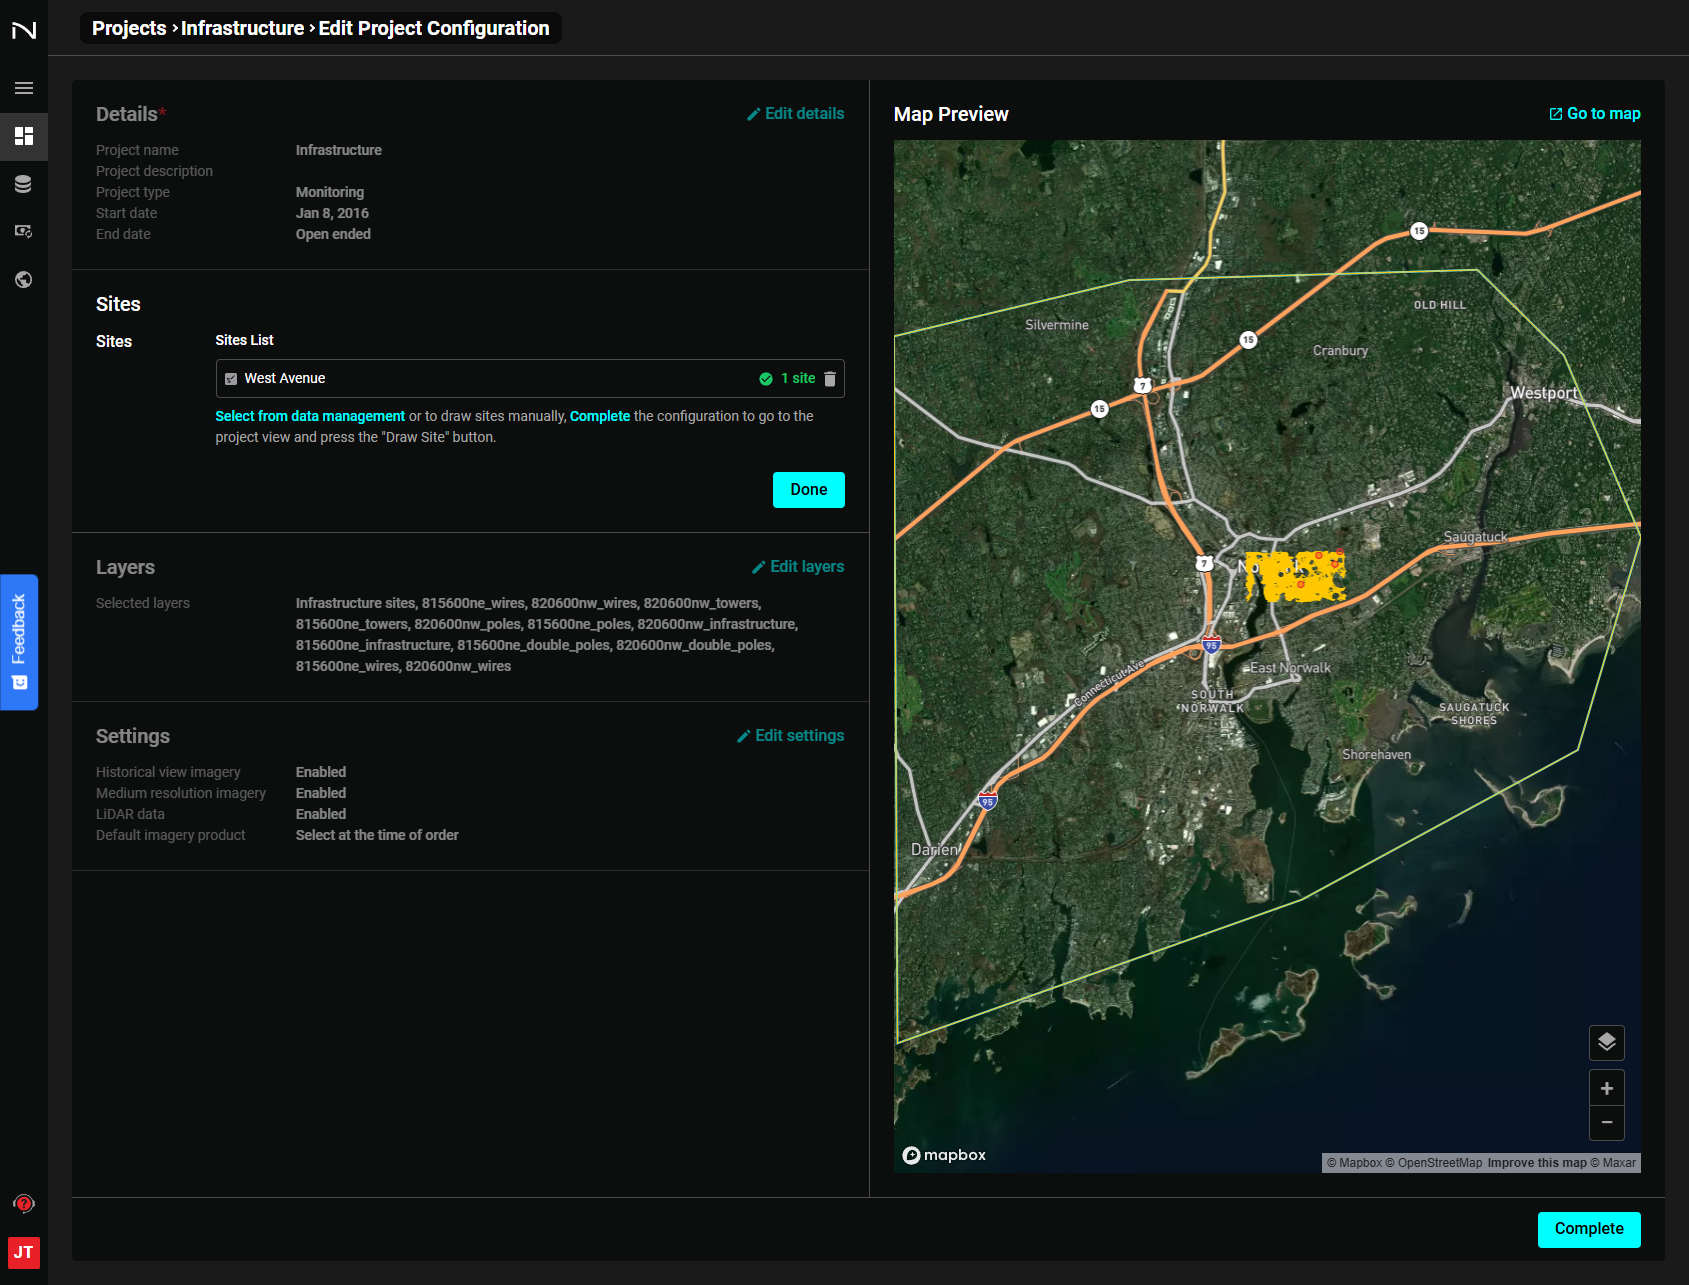
From here you can:
Rename and Delete Sites
Click the pencil or trash icon next to any site to rename or delete it.
Upload Data
Click Upload data to drag and drop a file or browse for it. Supported formats: GeoJSON, KML, KMZ, GPKG, SHP (zipped).
Select Existing Data
Click Select existing data to add data from another project into this one. This is useful when site boundaries defined in one project are relevant to multiple projects.
Draw a Site Manually
Click Draw site manually and draw directly on the map preview. This works the same as drawing in the main map view.
Edit Project Layers
Click Edit Layers to manage the project's map layers.
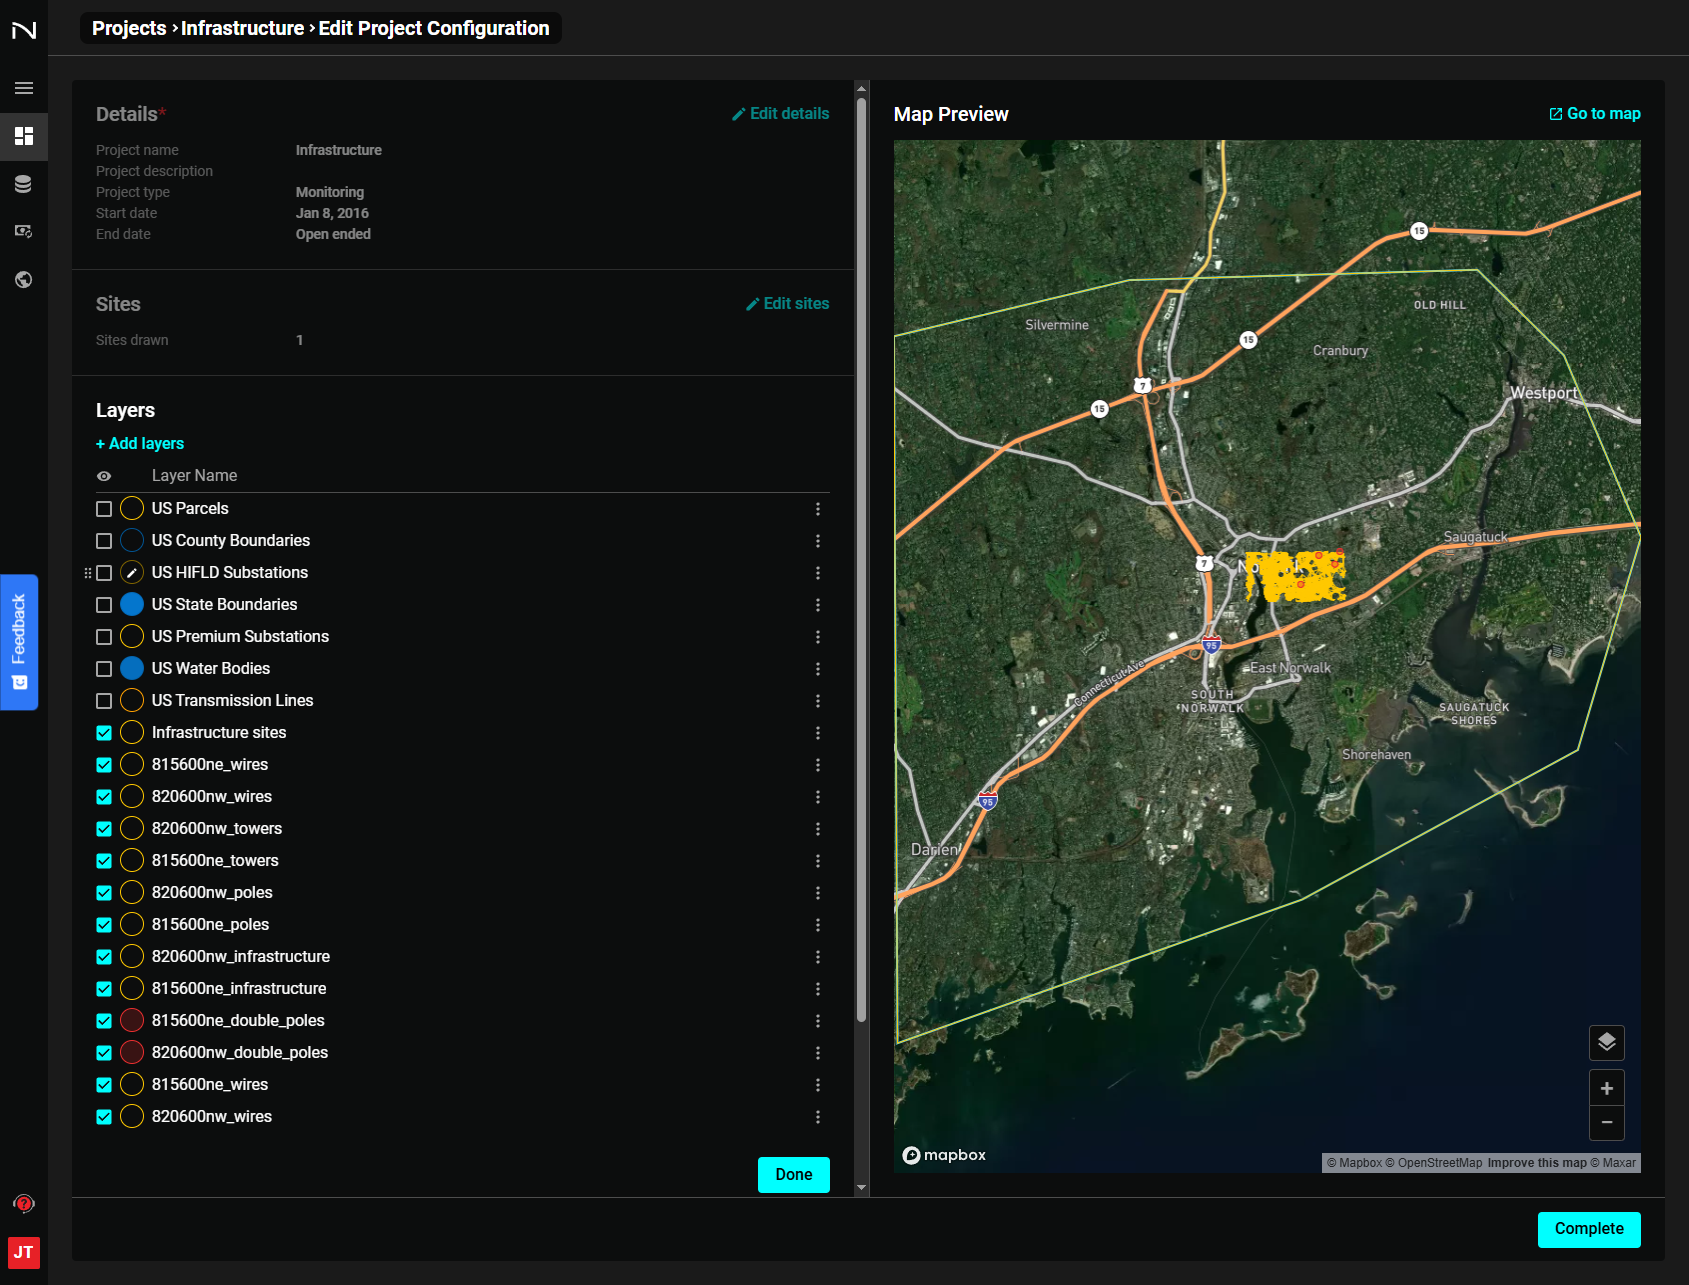
- To edit an existing layer, click the edit icon next to the layer name to rename or remove it.
- To add new layers, click Add layers. A menu will show available sites and Map Notes from other projects. Click Add next to any item to include it in the current project.
Adding layers from other projects makes it easy to cross-reference data across multiple projects.
Edit Project Settings
Click Edit Settings to open the imagery settings panel.
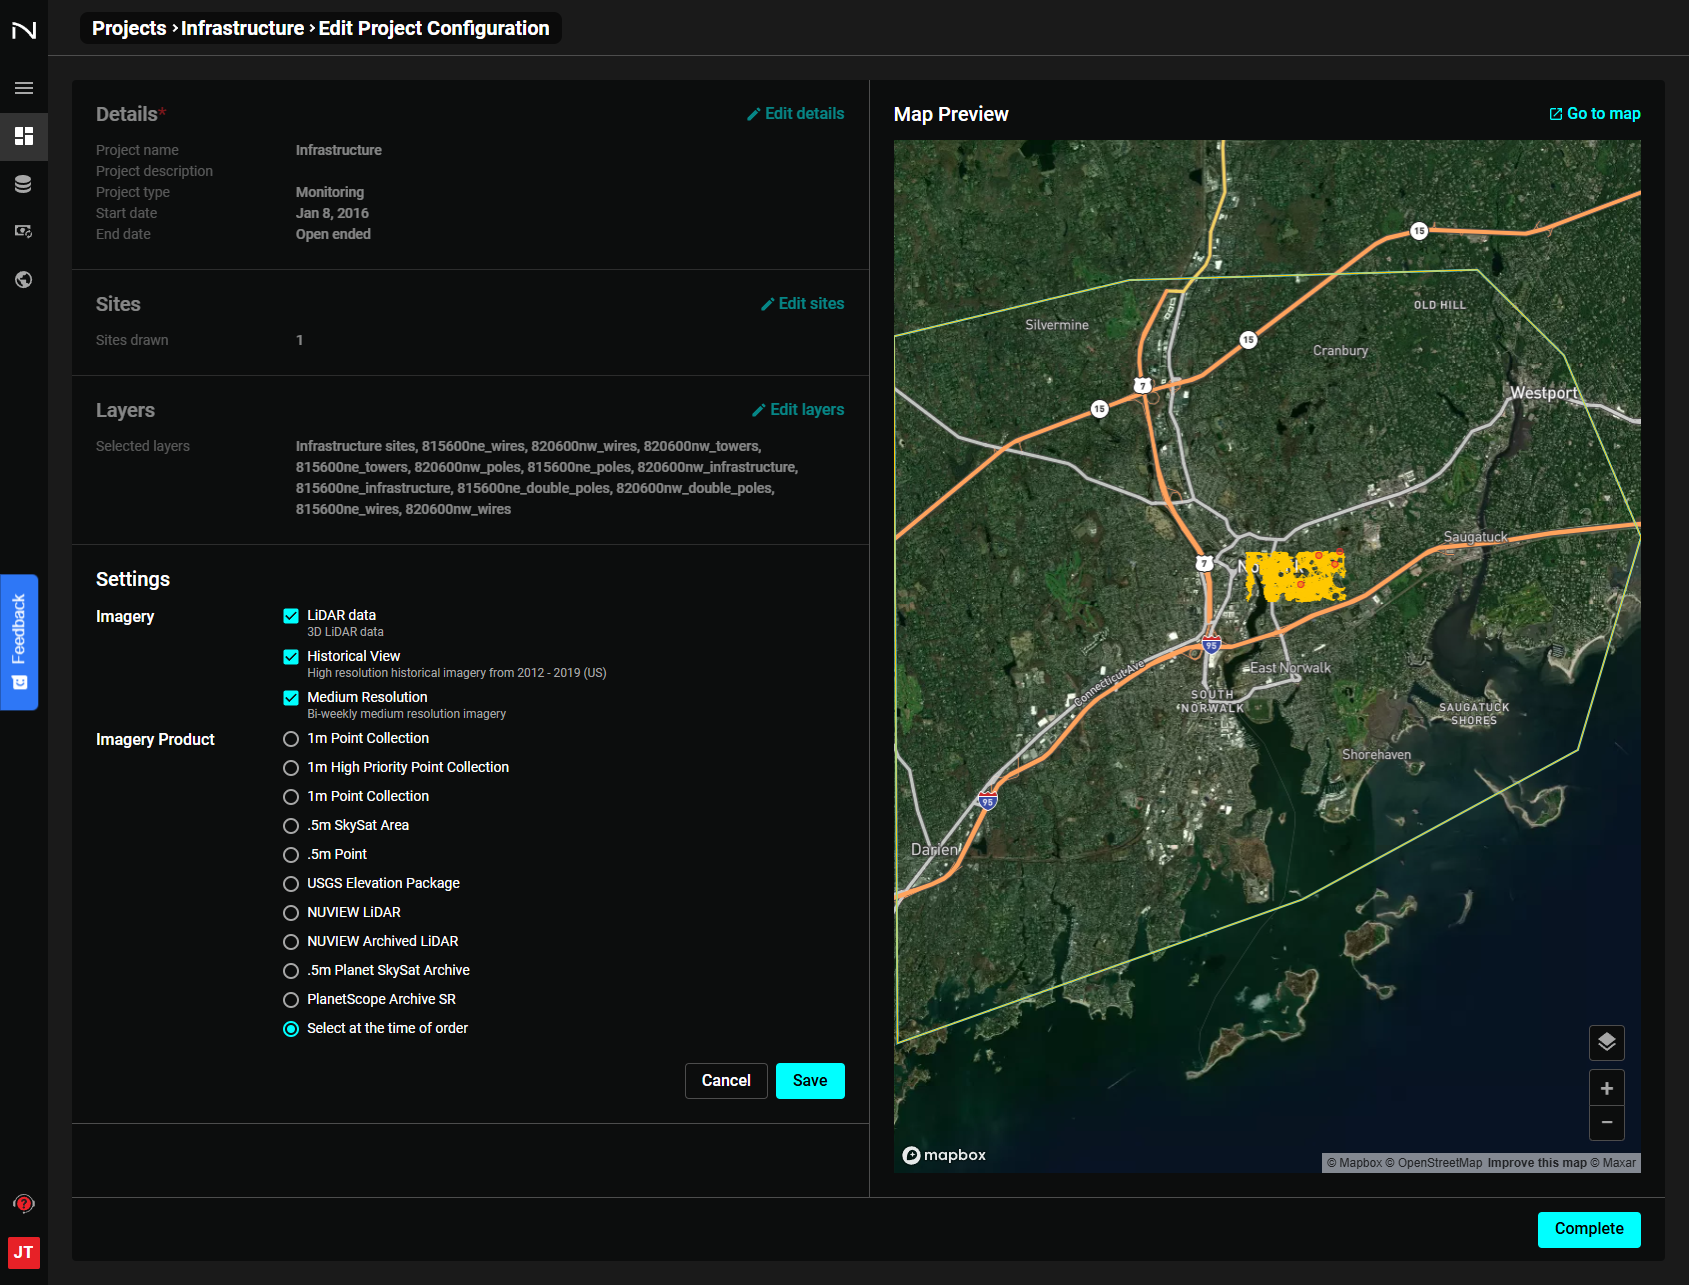
Depending on your NUVIEW account, you may have access to one or many imagery sources. Toggle which sources are visible to reduce clutter or add a second perspective when monitoring a site.