Projects & sites explained
Understanding how projects and sites are organized is key to using the NUVIEW Platform effectively. This article covers the basics of how they relate to each other and how to navigate between them.
What Are Sites and Projects?
Sites are your descrete areas of interest within the NUVIEW Platform. In the site view, you can view, annotate, compare, and analyze geospatial data. Sites are also the primary location for monitoring an area over time.
Projects are groups of one or more sites. All sites in a project share a common set of layers, timeframes for viewing imagery, and settings. Users typically group sites that share a common workflow or application into a single project.
The Home View of the NUVIEW Platform provides a summary of all your projects and sites. While the summary statistics give a useful overview, most analytical work happens within specific projects and sites.
Initial Overview
From the Home View, the top-left panel displays a count of active sites across all projects, as well as any updates.
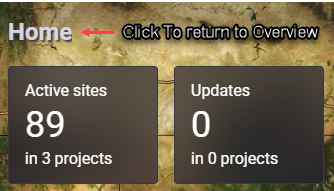
Navigating to Projects
From the Home View, you can zoom to a project to preview its site locations on the map, or open a project to explore its sites in detail.
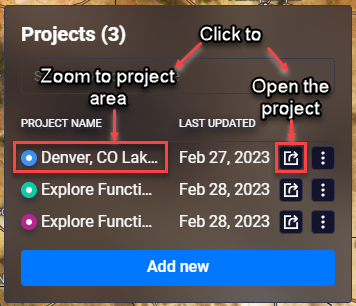
As you and your teammates edit sites and projects, the overview panels will update to reflect the latest information.
Select a Project to Zoom into It
Click a project name in the Projects panel to zoom the map to that project's area. The NUVIEW Platform zooms in immediately before loading imagery or timelines, which keeps load times fast.
The Title breadcrumb at the top will update to show the selected project name.

Note: As you navigate through projects and sites, the Title area displays as Home > Project > Site. This is called a breadcrumb. Each part of the breadcrumb can be clicked to navigate back to that level of the application.
At this point, the Active Sites and Updates panels will still show a summary across all projects.
Open a Project to View Its Sites
To open a project and view the sites within it, click the open project icon next to the project name.
The UI will update to list the sites within the selected project.
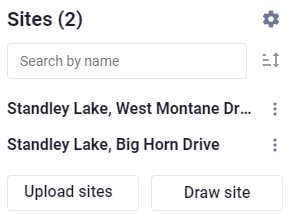
Click a site name to zoom into it. A "Features Info" window will pop up, allowing you to view site-specific information. For a basic site, only simple information such as perimeter and area will be visible. As your organization adds data to sites, additional details such as attribute fields will appear.
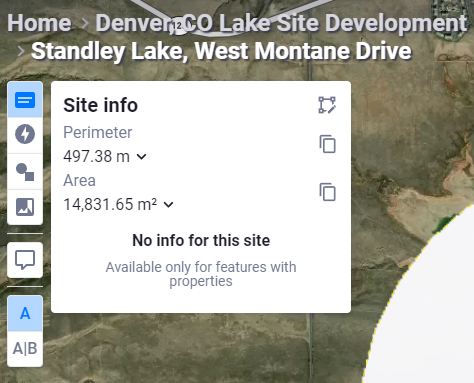
To enter a site, select the "Open" button on the top right of the "Features Info" window. Once your site is open, the imagery timeline will appear and you can begin visualizing, comparing, and annotating imagery data.
Navigating through Projects and Sites
When a site is opened, the Title breadcrumb updates to reflect the current location. To navigate back to the home page or project view, click the corresponding segment of the breadcrumb:
- Click Home to return to the overview and select a different project.
- Click the project name to return to the project view and select a different site.
- Users can also move directly from one site to another by clicking a nearby site on the map.
Note: The browser's back arrow can also be used to navigate to previous pages.
Timeline Feature
When a site is opened, the NUVIEW Platform zooms into it and displays a timeline at the bottom of the screen. The timeline shows available imagery related to the site over time.
